Difference between revisions of "Configuring Access Module for Onepoint (JUMP)"
Diego Lopes (talk | contribs) (Created page with " 1- In Onepoint, go to '''Settings''' > '''Backends'''. *Click '''New'''. *Select type '''Access Session Backend''', Select Class '''Apache Guacamole''' , Name: '''guacamol...") |
Diego Lopes (talk | contribs) |
||
| Line 31: | Line 31: | ||
* Click '''save property'''. | * Click '''save property'''. | ||
| − | 4- | + | 4- In Onepoint, go to '''Vault > Managed Credentials''',note that there is a Jump icon on accounts that have already been mailed to onepoint. |
| + | |||
| + | [[File:Jump4.png]] | ||
| + | |||
| + | *To make an SSH or RDP access, click on the JUMP button. | ||
| + | |||
| + | [[File:Jump5.png]] | ||
| + | |||
| + | * Click ''' Connect'''. | ||
| + | |||
| + | * After doing the steps above, a new browser window will open with the SSH or RDP connection. | ||
| + | |||
| + | [[File:Jump6.png]] | ||
| + | |||
| + | [[File:Jump7.png]] | ||
Revision as of 12:50, 4 June 2020
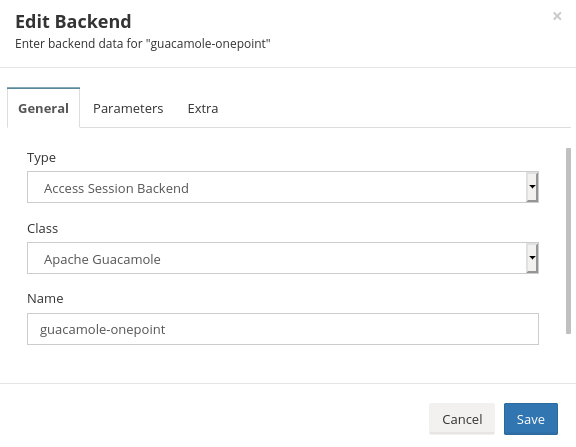
1- In Onepoint, go to Settings > Backends.
- Click New.
- Select type Access Session Backend, Select Class Apache Guacamole , Name: guacamole-onepoint.
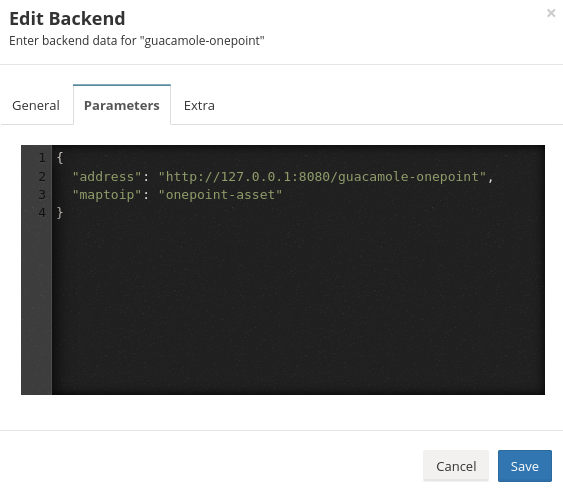
2- In the parameters, fill in the settings with your onepoint data.
 {
   "address": "http://127.0.0.1:8080/guacamole-onepoint",
   "maptoip": "onepoint-asset"
 }
- After having performed the configurations shown above click on save.
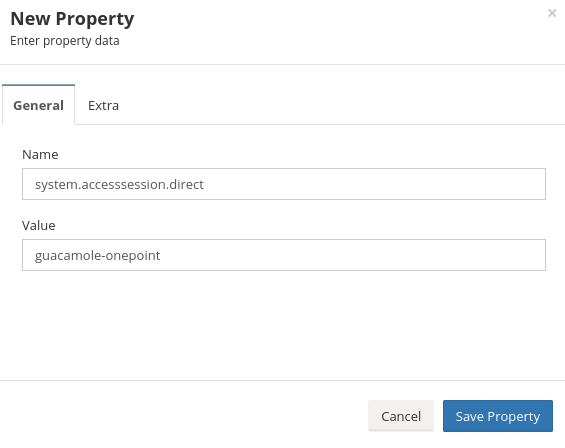
3- In Onepoint, go to Settings > System Properties.
- Click New
- Define the Name: system.accesssession.direct, Value:guacamole-onepoint.
- Click save property.
4- In Onepoint, go to Vault > Managed Credentials,note that there is a Jump icon on accounts that have already been mailed to onepoint.
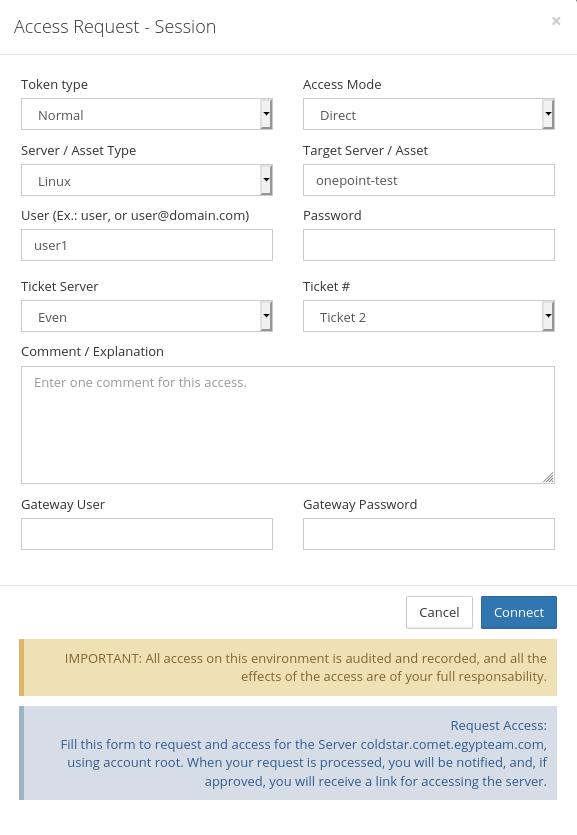
- To make an SSH or RDP access, click on the JUMP button.
- Click Connect.
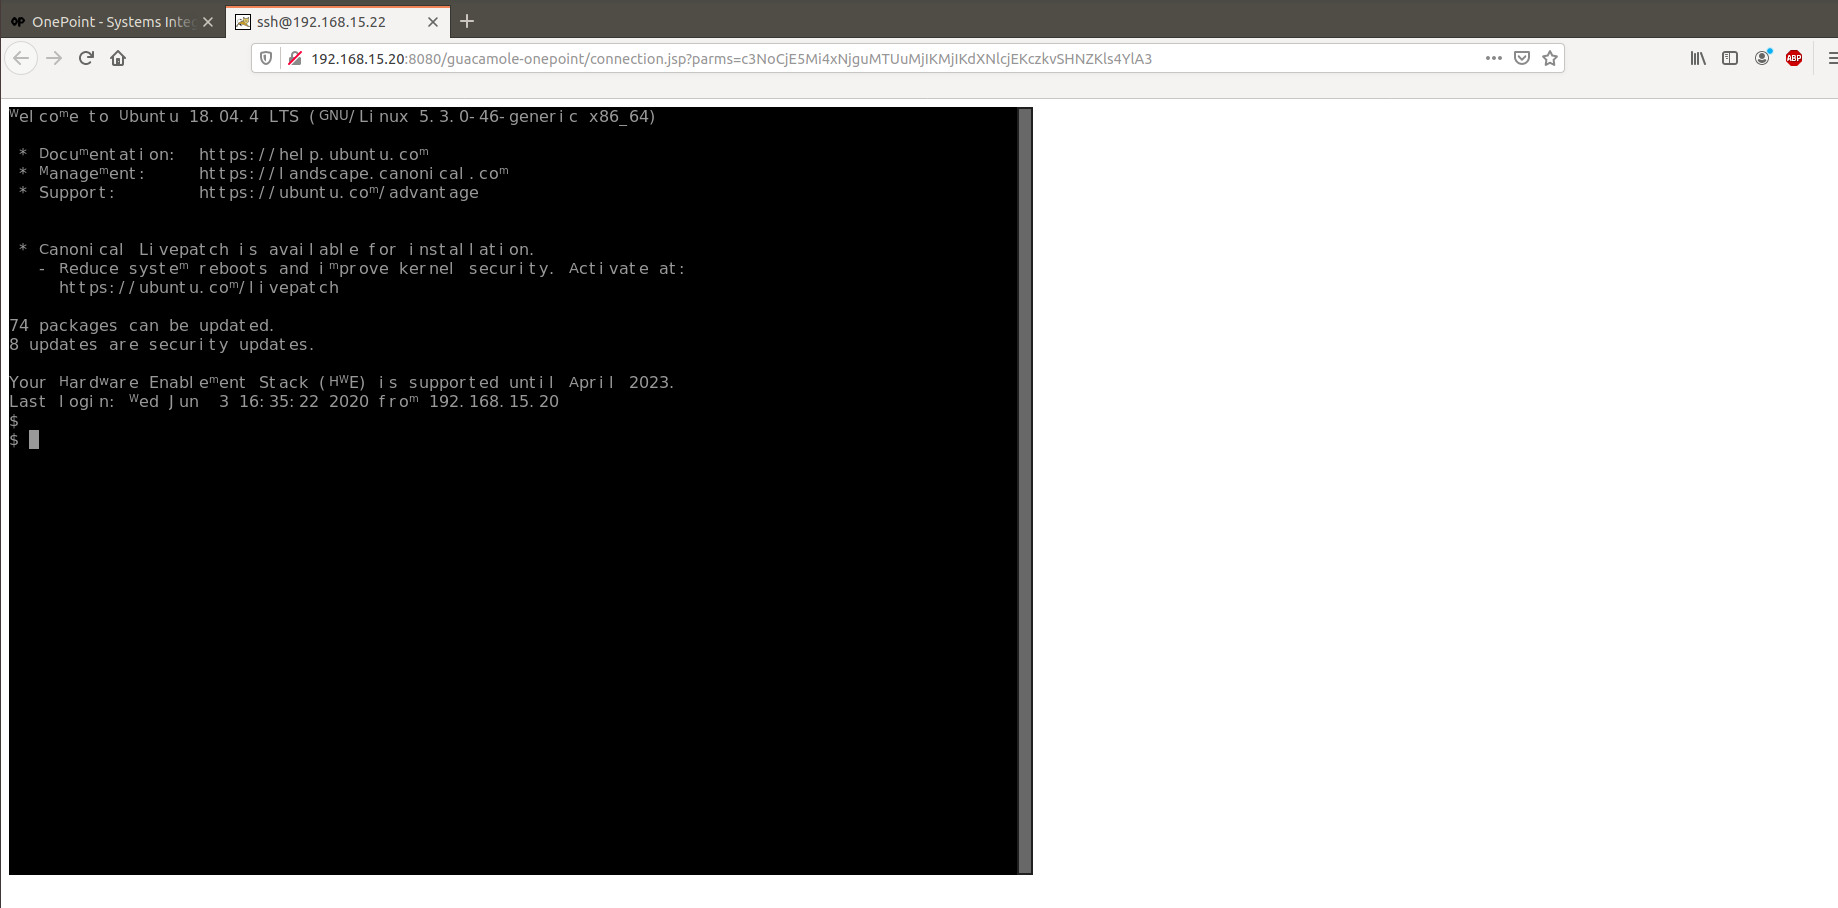
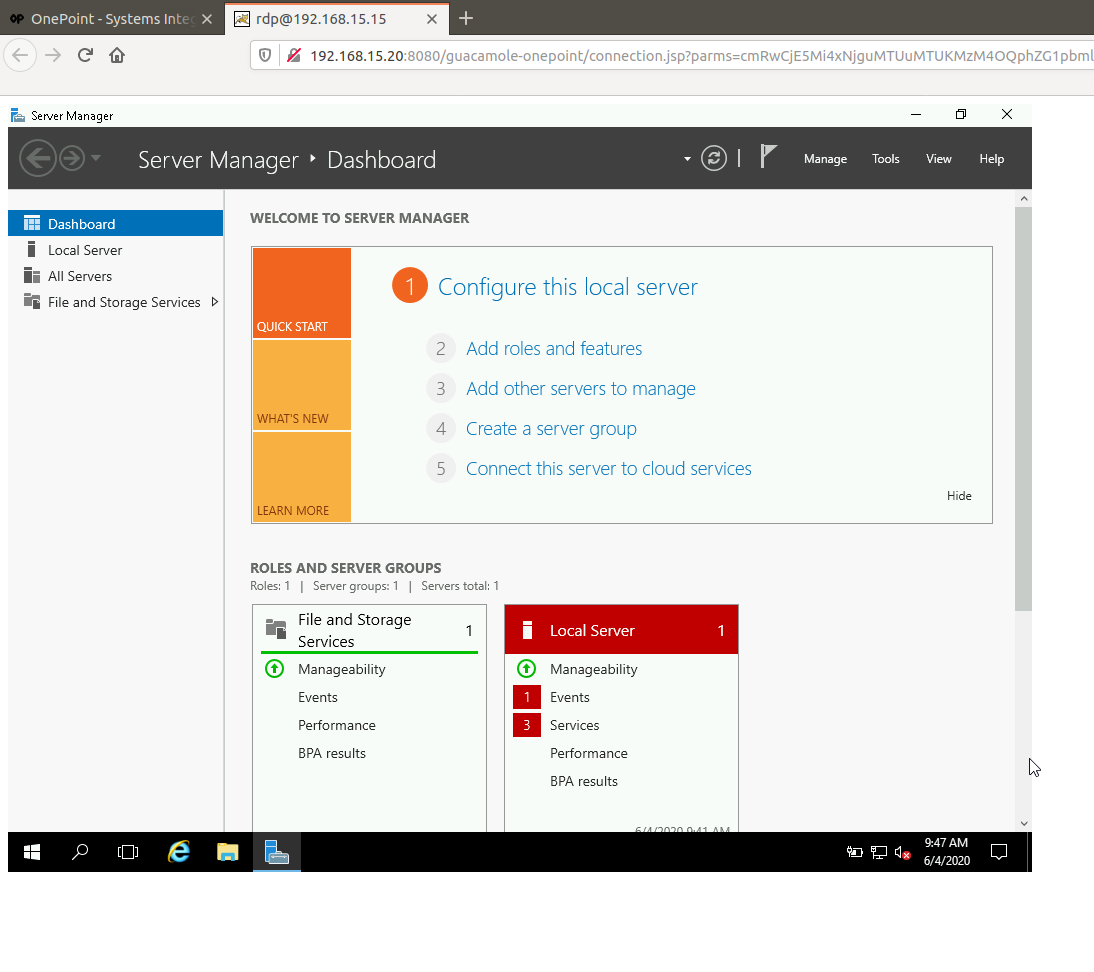
- After doing the steps above, a new browser window will open with the SSH or RDP connection.
